Supply and demand zones are powerful tools in technical analysis, offering insight into where price is likely to reverse or stall. But while many traders focus on how to identify these zones after they form, far fewer understand how to find supply and demand zones before everyone else does.
This article breaks down the process of finding supply and demand zones, how to spot them before they become obvious to the market, giving you a real edge in your trading.
1. Understanding the Concept
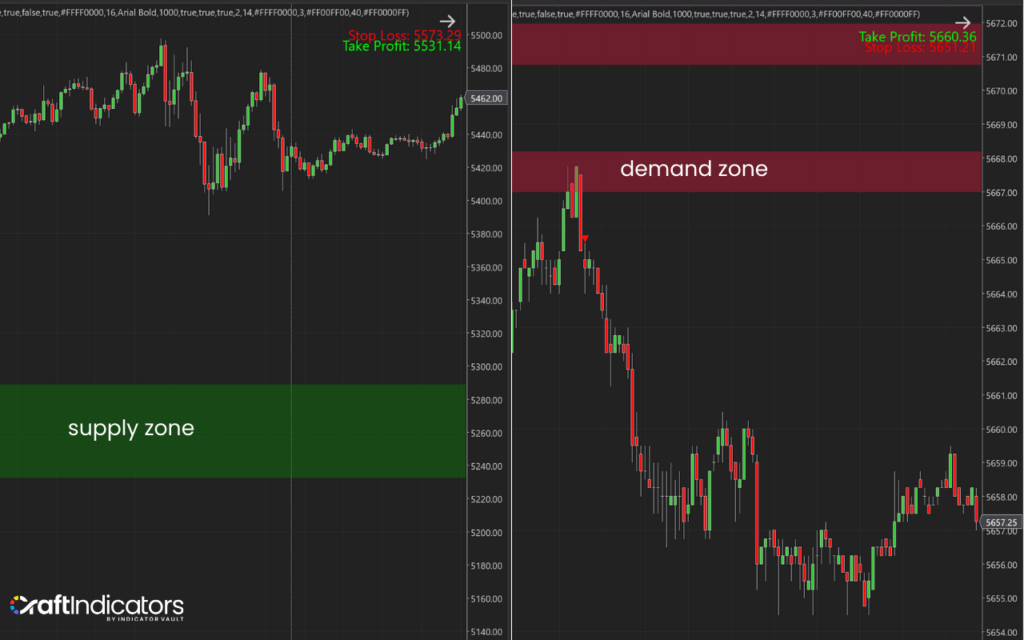
Supply and demand zones in trading are key areas on a price chart where strong buying or selling has occurred. A demand zone is where buyers enter the market in large numbers, pushing the price up. A supply zone is where sellers took control, driving the price down. These zones help traders spot potential reversals or breakouts, making them essential tools for understanding market behavior and planning trades.
2. The Difference between Finding vs. Identifying Supply and Demand Zones
Here’s something that many traders overlook: there's a big difference between finding and identifying supply and demand zones.
- Identifying zones means looking back on the chart and spotting where the price reacted in the past, after the fact.
- Finding zones, on the other hand, is a proactive skill. It’s about spotting the origin of big moves and marking those areas before the price comes back to them.
Finding zones requires a deeper understanding of price behavior and market structure. You’re not just looking for the obvious bounce point, you’re analyzing the chart to detect where strong buying or selling pressure first occurred and preparing for a potential reaction when the price revisits that zone.
Why is this important?
Because finding zones early gives you an edge. When you can pinpoint these levels in advance, you’re ready to act before the crowd. You can plan better entries, set tighter stop losses, and catch high-probability trades as price approaches these key areas, rather than chasing after it once the move has already happened.
This skill takes practice, but once you learn it, you’ll start to see the market the way big players do. That’s where real trading confidence begins. It’s one of the most valuable tips for supply and demand strategy.
3. How to Find Supply and Demand Zones
Supply Zone
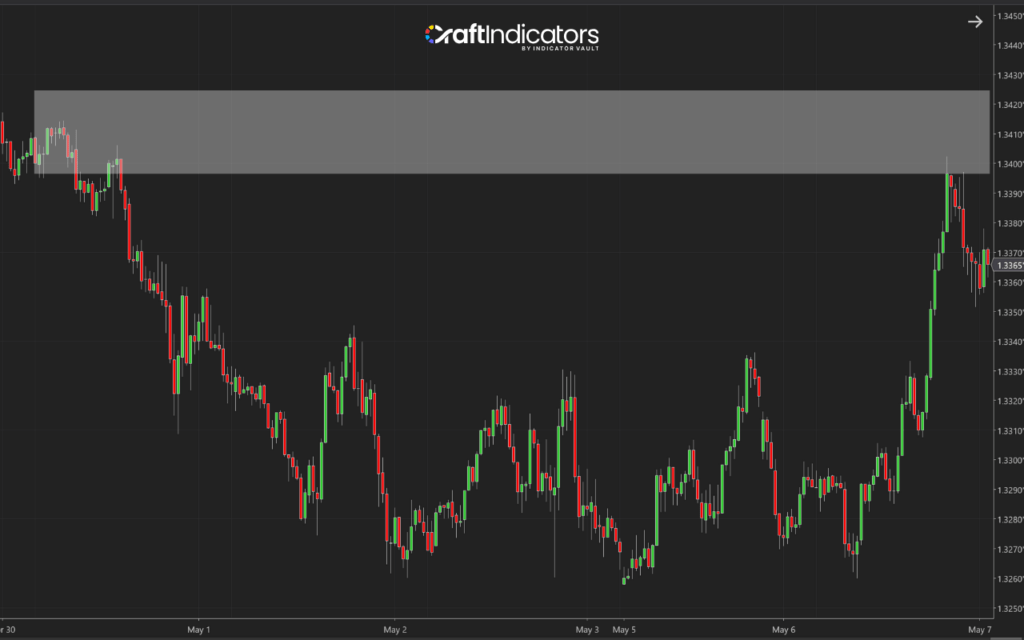
To find a supply zone, focus on areas where strong selling began. These zones often lead to future price drops when retested. Here's how to find them:
- Look for strong bearish moves with little or no pullback.
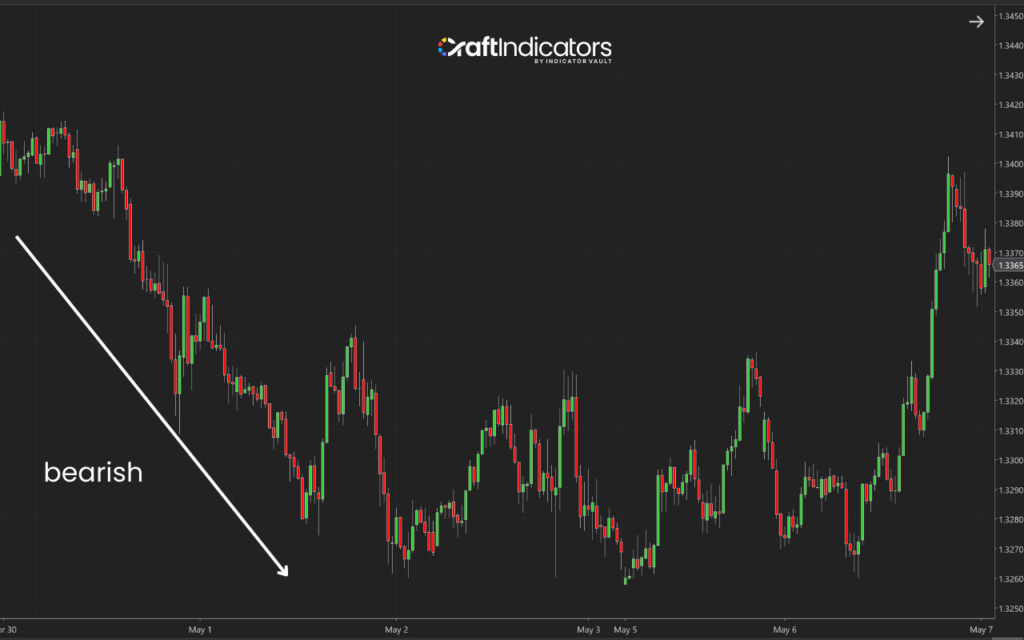
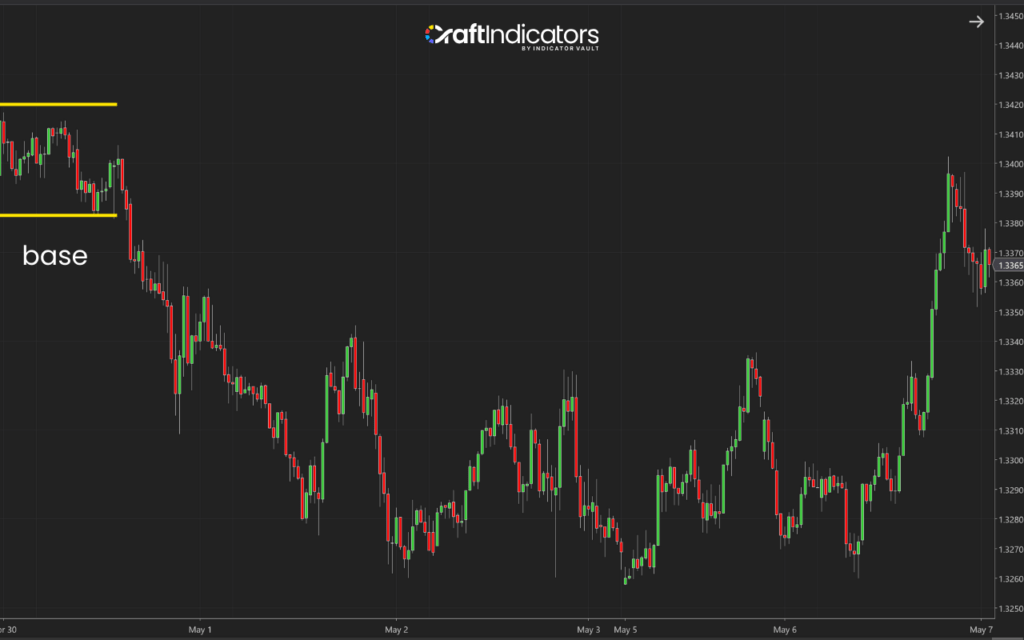
- Identify the origin of the move — the last small range or consolidation before the price dropped.
- Mark the base of the move where the price paused before falling fast.
- Refine the zone using wicks or bodies of the candles, depending on how clean the area looks.
Demand Zone
To find a demand zone, you’re looking for places where strong buying started. These zones can act as powerful support. Use these steps:
- Look for strong bullish moves with minimal pullback.
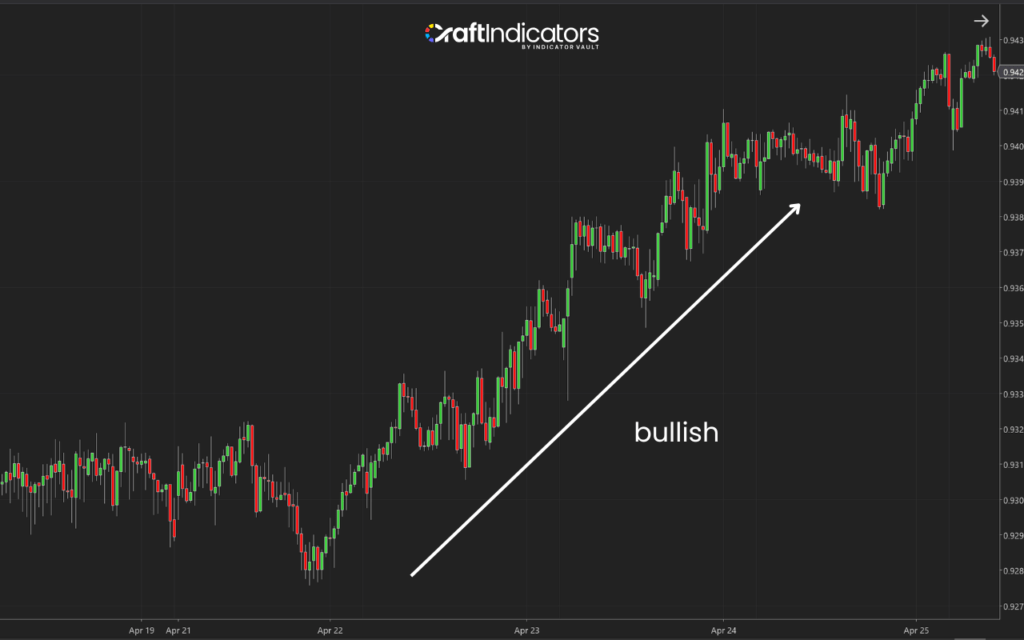
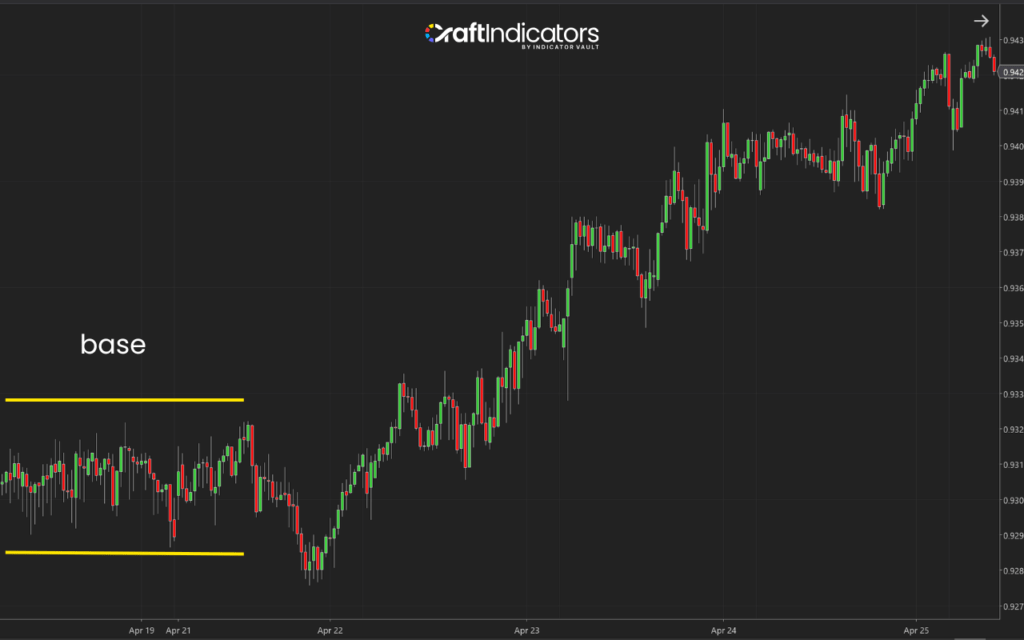
- Find the base of the rally, where the price paused or moved sideways before the upward surge.
- Draw the demand zone from that area — that’s where buyers stepped in.
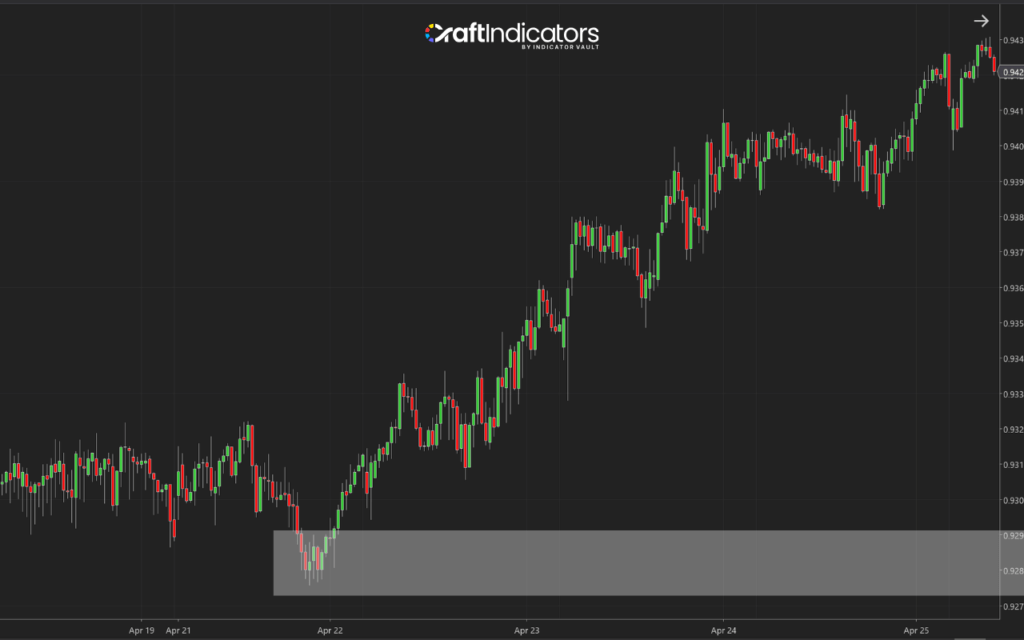

- Choose clean zones with few retests for better reliability.
4. Common Mistakes When Finding Zones
Confusing Finding with Identifying
Many traders look at past reactions and assume that’s the same as finding a zone. But identifying is reactive; it shows where the price has already reacted. Finding is proactive; it’s about spotting where the imbalance began, before the price comes back.
Drawing Zones Too Wide or Too Narrow
If a zone is too wide, entries become unclear, and the risk increases. If it’s too narrow, you might miss the actual reaction area. Always base your zones on the origin of the move, and decide whether to use wicks or bodies based on how the price behaved.
Ignoring Market Context
A strong demand zone in a bearish trend is less reliable. Always check the overall trend, major support/resistance levels, and news events before trusting a zone.
Using Zones with Too Many Retests
Zones that have been touched multiple times lose strength. The more times a price visits a zone, the weaker it becomes. Fresh zones are usually more powerful.
Forcing Zones in Choppy Markets
In sideways or noisy markets, it's easy to misread price action. Don’t try to force a zone where there’s no clear imbalance. Wait for a clean, impulsive move to confirm a valid zone.
5. Supply and Demand Indicator
The steps above show the traditional way to draw supply and demand zones. Many traders still use this method to learn and practice. But now, you don’t have to draw zones by hand. You can use a tool like the Supply and Demand Indicator designed by Craft Indicators to make it faster and easier.
Download the Supply and Demand Pro Indicator to level up your strategy. Click this link to get it now
To set it up on NinjaTrader 8 (NT8), follow these steps:
First, purchase the Supply and Demand Pro Indicator. Open NT8, go to Control Center, choose Import, and then click on the NinjaScript Add-on to add the Indicator.
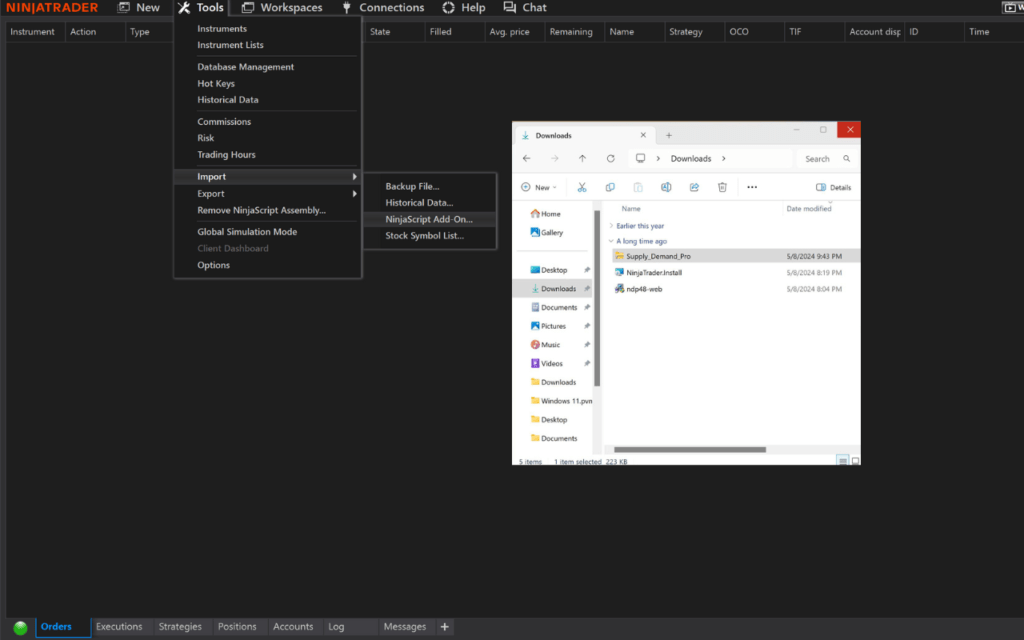
Open the chart where you want to use it.
Right-click on the chart and select “Indicators.” Find Supply and Demand Pro in the list and double-click to add it.
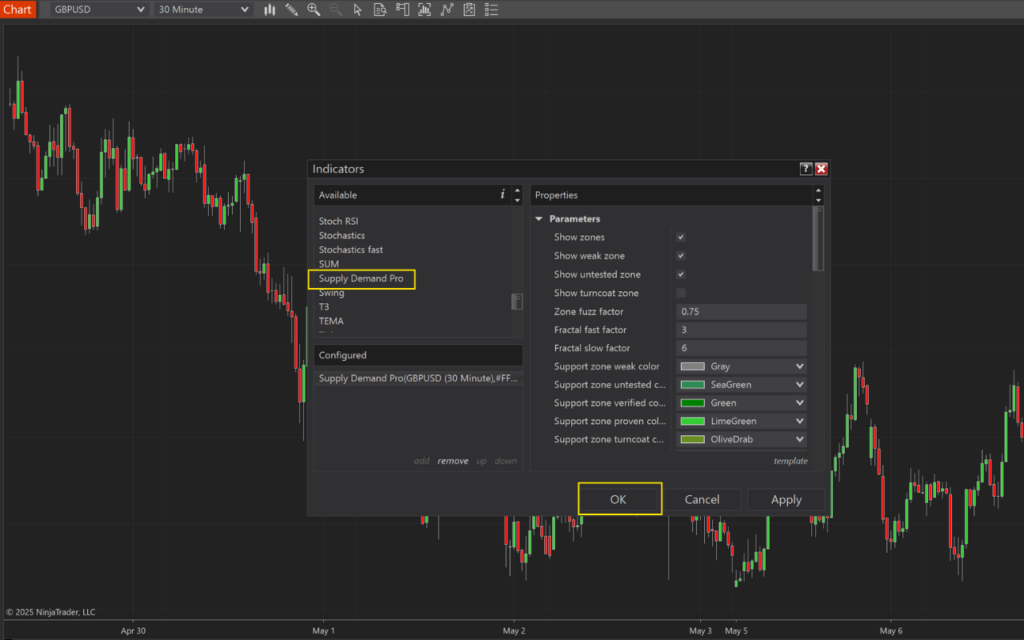
Click “OK,” and the zones will appear automatically.
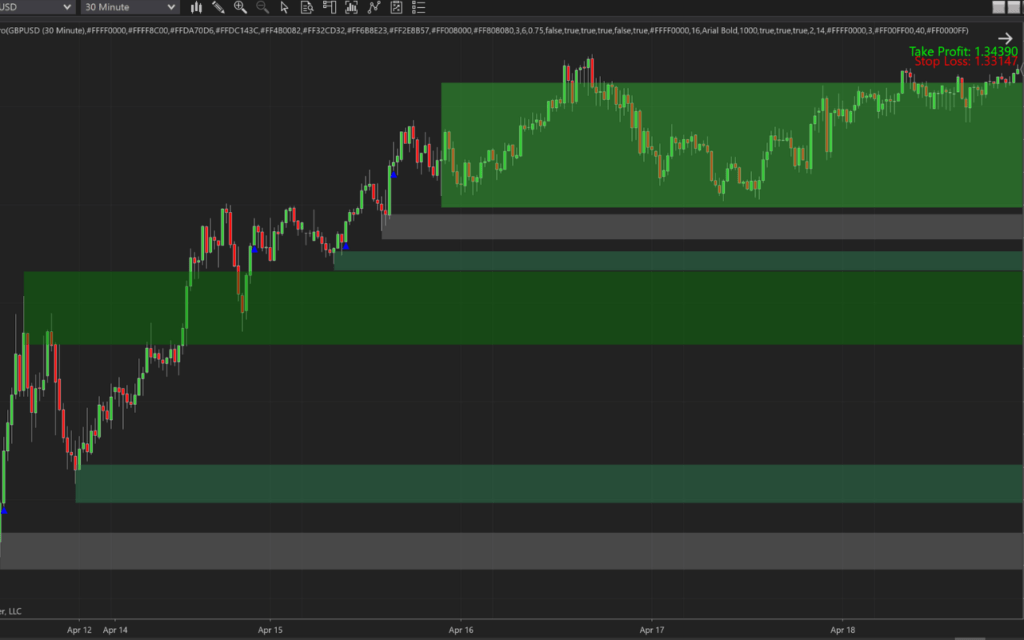
This tool helps you save time and avoid errors. Even if you like to draw zones the traditional way, the indicator is a great way to confirm your analysis.
The Bottom Line
Finding supply and demand zones is a powerful skill that helps traders spot high-probability trade setups before the crowd. By focusing on strong price moves, clean bases, and market context, you can mark key areas with confidence. Whether you use traditional methods or a tool like the Supply and Demand Pro Indicator, consistent practice is the key to success.
Also, follow us for all the promotions and other useful topics:
- Facebook: www.facebook.com/craftindicators
- Instagram: www.instagram.com/craftindicators

