The Supply and Demand Pro indicator is an essential tool used in trading to identify potential supply and demand zones on a price chart.
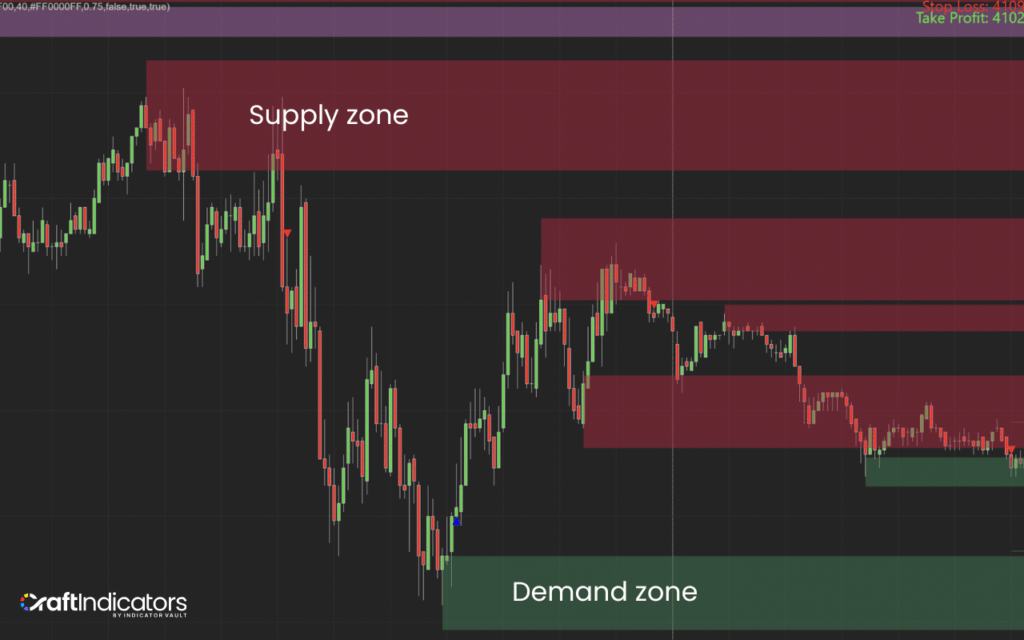
It works by detecting key levels where buying or selling pressure has previously shifted the market, highlighting these zones as areas of interest that can influence future price movements and provide valuable trade opportunities.
In this review, we’ll explore how the Supply and Demand Pro indicator works, why it’s vital for spotting market turning points, and how you can use it to elevate your trading strategy to the next level.
1. Supply and Demand Concept
In trading, supply and demand move the markets. When more traders want to buy than sell, prices rise. When more traders want to sell than buy, prices fall. These shifts create zones on the chart where price is likely to react again, either reversing or pausing.
Understanding supply and demand in trading is key to spotting strong entry and exit points. These zones often reveal where big players, like banks or institutions, have placed their orders. If you can spot these levels early, you gain an edge in the market. That’s where the Supply and Demand Pro indicator comes in. It automatically finds these important zones for you and marks them clearly on your chart. Instead of guessing, you get a clear map of where the price may bounce or reverse. It’s a smart, time-saving tool that helps you trade with confidence and precision.
2. Special Features of This Indicator
The Supply and Demand Pro indicator comes with smart features that make trading easier and more effective. Here’s what makes it special:
- Instantly find supply and demand zones: This indicator automatically detects the strongest supply and demand zones on any currency pair and across all timeframes. Whether you're a short-term trader or a long-term investor, it highlights the key areas where price is most likely to react.
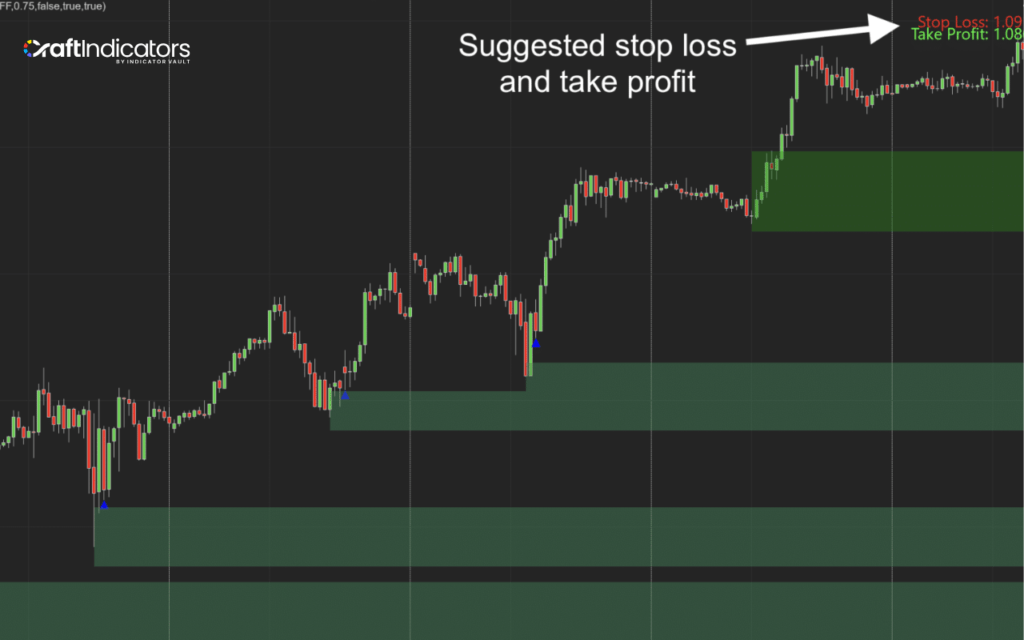
- Perfectly placed stop loss and take profit: One of the biggest challenges in trading is knowing where to exit. This tool shows you the ideal spots to place your stop loss and take profit, helping you protect your capital while maximizing your gains.
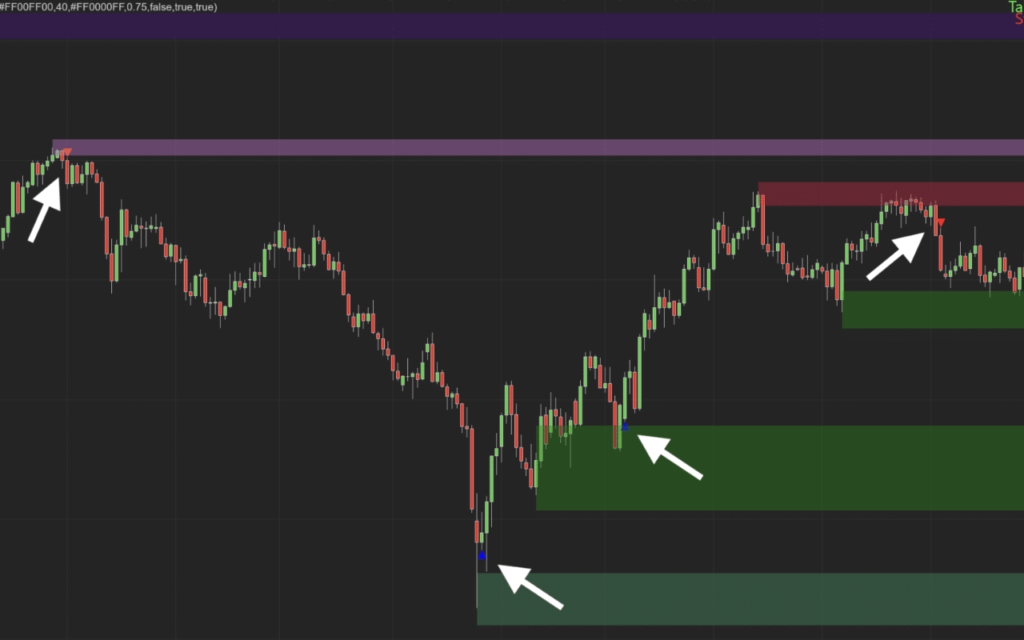
- Real-time alerts when it matters most: Stay one step ahead of the market with timely alerts. The indicator notifies you the moment price enters a critical zone, so you never miss a high-probability setup, even if you’re away from your screen.
With its precision and simplicity, the Supply and Demand Pro indicator gives you the edge to trade smarter, not harder.
3. How Traders Use the Supply and Demand Pro Indicator
If you want to make smarter trading decisions, the Supply and Demand Pro indicator can help by clearly showing where the price is likely to react. Here’s how you can use it to boost your trading performance:
- Zone Identification: Quickly identify supply and demand zones directly on your chart. These key levels are where buyers or sellers have previously entered the market, making them high-probability areas to watch.
- Price Reversals: These zones often act as strong support or resistance. Traders use them to spot potential price reversals or breakout points, helping to time entries and exits more effectively.
- Risk Management: The indicator also supports better risk management. It guides you in placing stop-loss and take-profit levels just outside or inside the zones. This helps reduce risk while aiming for higher rewards.
4. Tips for Incorporating the Indicator into Your Trading Strategy
To get the most out of the Supply and Demand Pro indicator, it’s important to use it with a clear plan. Here are some helpful tips for supply and demand in trading that can improve your results:
- Identify Strong Zones First: Focus on the zones where the price moved sharply in the past. These are usually the strongest supply and demand areas and can give you higher-probability setups.
- Use Higher Timeframes for Zone Validation: Check zones on higher timeframes like the 4-hour or daily chart. These zones often hold more weight and provide stronger signals compared to lower timeframes.
- Wait for Price to Retest a Zone: Don’t jump in immediately. Wait for the price to come back and retest a zone. Look for reversal signs like candlestick patterns or a slowdown in momentum before entering a trade.
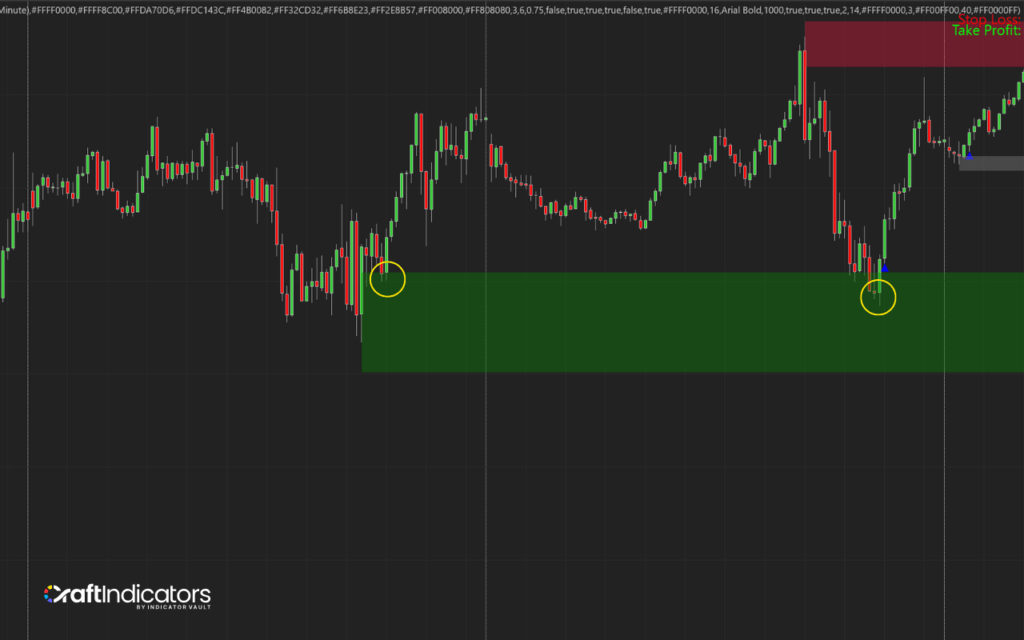
- Combine with Other Tools: Use the indicator alongside other tools like moving averages, RSI, or trendlines. This adds extra confirmation and helps filter out false signals.
By following these tips, you can use the indicator more effectively and build a solid strategy around supply and demand in trading.
The Bottom Line
The Supply and Demand Pro indicator isn’t just another tool, it’s your edge in the market. By pinpointing powerful zones, guiding your entries, and sharpening your risk management, you can turn smart analysis into real results. If you're serious about leveling up your trading game, this is the tool your strategy’s been waiting for.
Also, follow us for all the promotions and other useful topics:
- Facebook: www.facebook.com/craftindicators
- Instagram: www.instagram.com/craftindicators

