Supply and demand trading strategy is a powerful approach used by traders to identify key areas in the market where price is likely to react. By focusing on the balance between buyers and sellers, this strategy helps traders make informed decisions based on price action. In this post, we’ll explore how to identify high-probability zones, apply the supply and demand trading strategy, and improve your market timing with precision.
1. Understanding Supply and Demand in Trading
Supply refers to the availability of a particular asset or financial instrument at specific price levels. In trading, supply zones represent areas where sellers are likely to enter the market, creating resistance and potentially pushing prices lower. These zones are often formed after strong downward moves, indicating a buildup of selling interest that can cap price advances.
Demand is the opposite, it represents the willingness of buyers to purchase an asset at certain price levels. In the market, demand zones are viewed as areas of support, where buyers are expected to step in and drive prices upward. These zones typically form after sharp rallies, highlighting areas where buying pressure is strong.
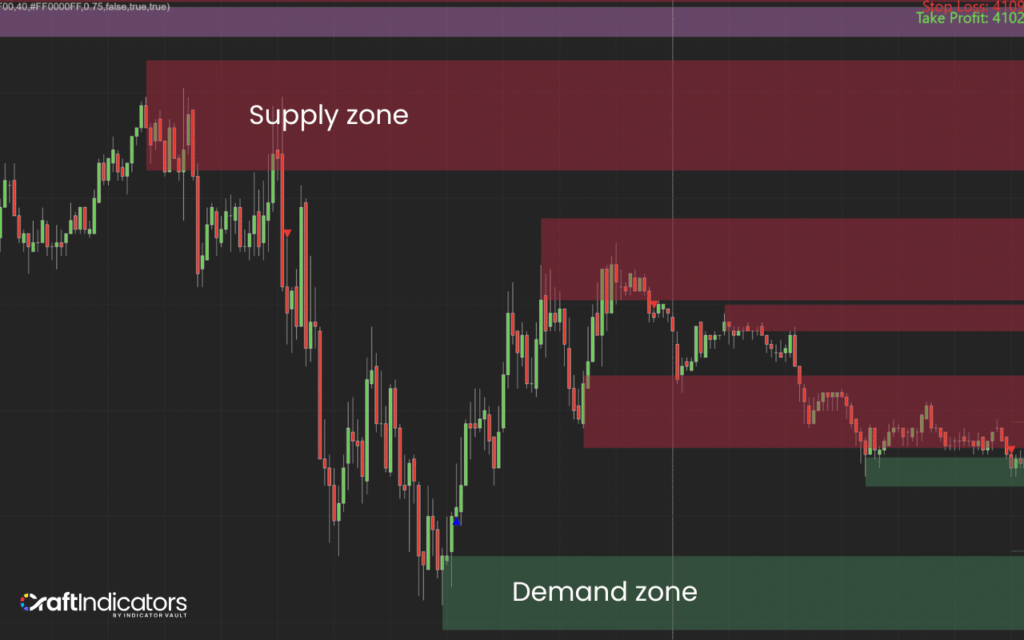
Supply and demand play a big role in how the market moves. They help create the points where price changes direction and show traders where good trading chances may appear. When traders learn to spot these areas, they can better guess what the market might do next. This helps them make smarter choices about when to enter or exit a trade, leading to better results over time.
2. Supply and Demand Trading Strategy
Trading with the Trend Continues
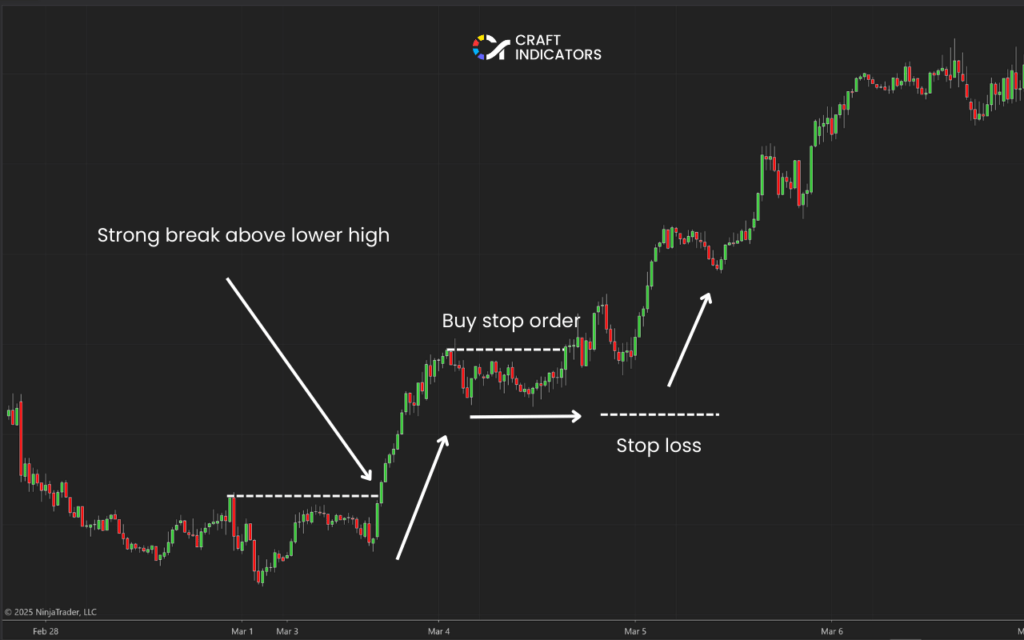
In a Supply and Demand Strategy, the Rally-Base-Rally (RBR) and Drop-Base-Drop (DBD) patterns are used to trade in the direction of the trend. These patterns form after a strong price move, followed by a short pause or consolidation called a base. Traders use the momentum from the initial rally or drop to predict that the breakout will continue in the same direction.
Entry
To enter a trade, first identify either a rally or a drop followed by a tight base. In an RBR, wait for the price to break above the base. In a DBD, wait for a break below. Traders often place a stop order just outside the base to catch the breakout as it happens.
Stop Loss
A stop loss is placed just beyond the opposite side of the base. This helps protect against false breakouts.
Profit
Take profit levels are usually set at the next key supply or demand zone, where the price may slow down or reverse.
Trading with the Reversals
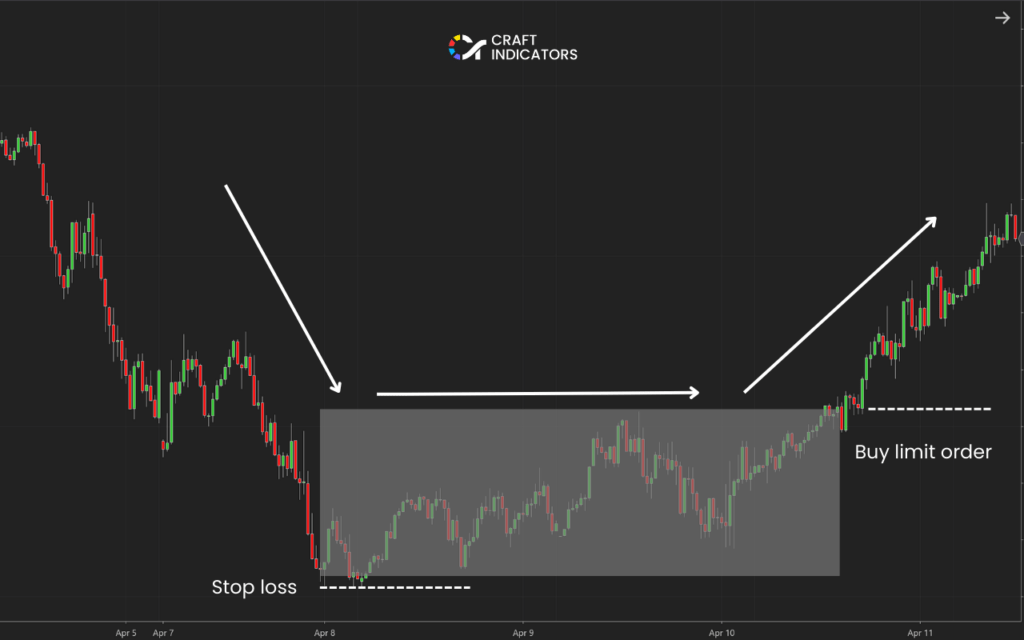
In the Supply and Demand Strategy, reversal setups like Rally-Base-Drop (RBD) and Drop-Base-Rally (DBR) focus on catching price turning points at strong, established zones. These patterns occur when price enters a supply or demand zone, pauses briefly (the base), and then reverses. By combining zone strength with clear reversal price action, traders can identify zones where the market is likely to change direction.
Entry
Look for an RBD forming within a supply zone or a DBR within a demand zone. Wait for a key high (in RBD) or low (in DBR) to break, signaling a shift in control. Place a limit order at the edge of the zone during the retracement to catch the move early.
Stop Loss
Set a stop loss just beyond the opposite side of the zone to protect against failed setups.
Take Profit
Take profit is typically aimed at the next opposing supply or demand zone, where price may react or reverse.
3. Simplify Your Strategy with Supply and Demand Indicator
The steps we’ve covered follow a traditional supply and demand strategy, where traders manually identify zones and read price action. While powerful, it can be time-consuming and tricky for beginners. That’s why we’ve designed a simpler strategy using the supply and demand indicator. This tool helps you automatically find key zones, so you can focus on planning trades instead of drawing levels and reading charts manually.
Timely Exit
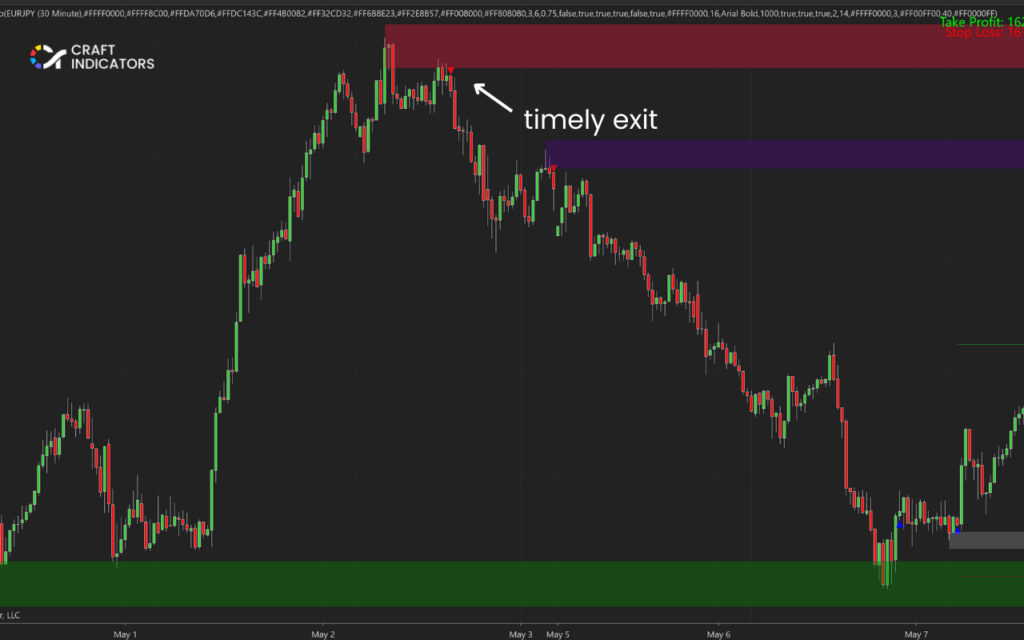
One key advantage is achieving a timely exit. The indicator clearly marks zones where price is likely to react, helping you decide when to take profits or close a trade. Instead of guessing where the price might turn, you can use these visual zones as clear targets, leading to more consistent and confident decision-making.
Strong Force Leaving the Zone
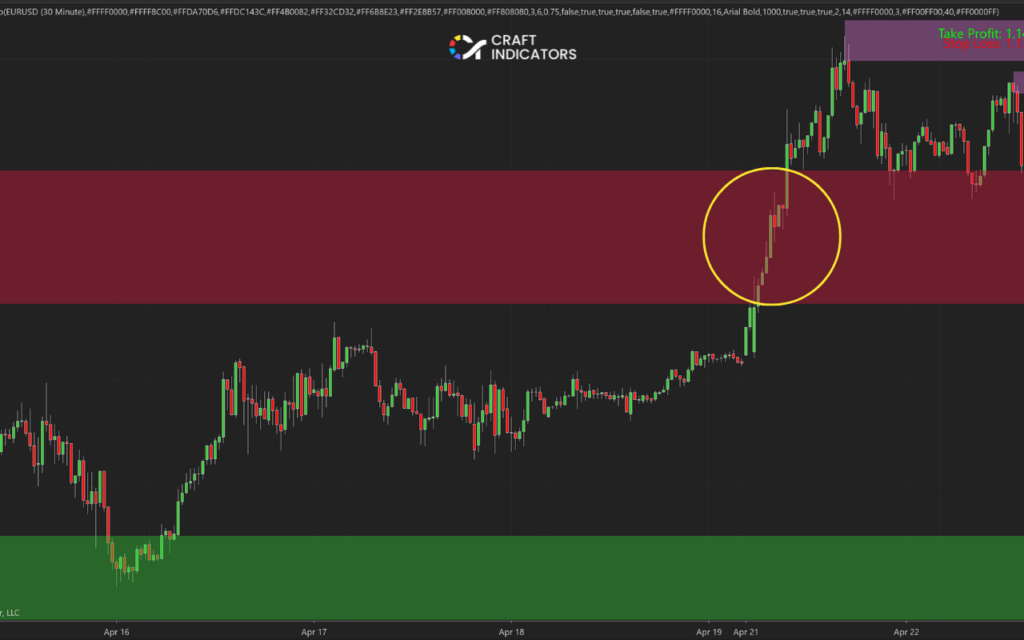
When price shoots out of a zone with power, it means there’s a strong force behind the move. This could be big buyers or sellers stepping in. The faster and stronger the breakout, the better the zone usually is. These are the best areas to trade from because they show clear control from one side of the market.
Freshness
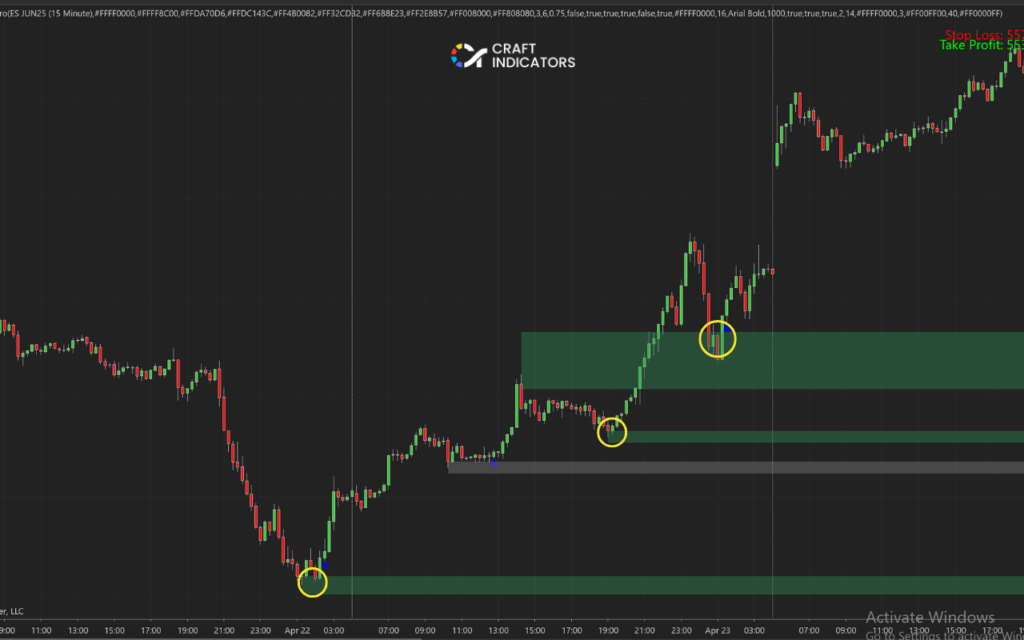
Always make sure a zone is still “fresh”, which means the price hasn’t returned to it since it was created. Each time the price touches a zone again, it becomes weaker because more orders get filled. The first touch is usually the strongest and gives the best chance for a good trade.
The Bottom Line
The supply and demand trading strategy offers a powerful way to understand market movements and make smarter trading decisions. Whether you use a manual approach or an indicator, mastering this strategy can give you a clear edge in any market.
Also, follow us for all the promotions and other useful topics:
- Facebook: www.facebook.com/craftindicators
- Instagram: www.instagram.com/craftindicators

